m (Reverted edits by 189.113.74.108 (talk) to last revision by Theluxure) Tag: Rollback |
|||
| (31 intermediate revisions by 14 users not shown) | |||
| Line 3: | Line 3: | ||
In [[Expert Mode]], bosses drop [[Treasure Bag]]s which contain exciting Expert Mode exclusive items. These include, but are not limited to: the [[Omega Drive]], which summons a pet that is able to attack; and the [[Dormant Hammer]], a key component in the ultimate weapon of the mod, [[Mjölnir]]. |
In [[Expert Mode]], bosses drop [[Treasure Bag]]s which contain exciting Expert Mode exclusive items. These include, but are not limited to: the [[Omega Drive]], which summons a pet that is able to attack; and the [[Dormant Hammer]], a key component in the ultimate weapon of the mod, [[Mjölnir]]. |
||
| − | Defeating these bosses are not required for game progression, but may be beneficial as they can provide useful items and access to new [[NPC|Town NPC]]s. Defeating The |
+ | Defeating these bosses are not required for game progression, but may be beneficial as they can provide useful items and access to new [[NPC|Town NPC]]s. Defeating The Primordials, a post-[[Moon Lord]] boss, grants new end-game equipment that overpowers some of the vanilla end-game content twice over. |
| − | Similar to vanilla [[ |
+ | Similar to vanilla [[Terraria]], players that are under prepared may find bosses challenging, and players that are over prepared may find the boss fight too easy. Hence it is up to the player's discretion to adjust the angle at which they tackle the different bosses, ensuring they are able to enjoy fighting them to the best degree. |
== [[Pre-Hardmode]] Bosses == |
== [[Pre-Hardmode]] Bosses == |
||
=== [[The Grand Thunder Bird]] === |
=== [[The Grand Thunder Bird]] === |
||
| ⚫ | |||
| + | {{dablink|For elaborate strategies on defeating The Grand Thunder Bird, including [[Weapon]] and Arena recommendations, see [[Guide:The Grand Thunder Bird strategies]].}} |
||
{| style="width:100%" |
{| style="width:100%" |
||
| − | | width=" |
+ | | width="20%" align=center | [[File:The Grand Thunder Bird.png|link=The Grand Thunder Bird]] |
| − | | width=" |
+ | | width="80%" | |
| − | |||
| ⚫ | |||
[[File:Grand Flare Gun.png|right|link=Grand Flare Gun]] |
[[File:Grand Flare Gun.png|right|link=Grand Flare Gun]] |
||
| − | '''The Grand Thunder Bird''' is a tan and turquoise feathered bird with 1,500 |
+ | '''The Grand Thunder Bird''' is a tan and turquoise feathered bird with 1,500 / {{expert|2,000}} health. It is summoned with a [[Grand Flare Gun]] using [[Storm Flare]]s during the [[Day]] in the [[Desert]]. It has a delayed charge attack that can be halted with a melee strike, and will also summon [[Storm Hatchling]]s, create storm clouds over the player's head that rain down tornado-inducing lightning bolts, and utter loud cries that bring down bolts of energy from the sky. It is considered the easiest boss in Terraria, but may still prove a challenge to unprepared players. Defeating The Grand Thunder Bird is required for the [[Desert Acolyte]] [[NPC]] to move in. |
The Grand Thunder Bird drops lightning bird-themed weapons and accessories, as well as [[Sandstone Ingot]]s, an early game [[crafting material]]. It also drops the [[Zephyr's Feather]] in Expert Mode, an accessory, which allows limited ascending and gliding with the help of a Grand Thunder Bird hatchling. |
The Grand Thunder Bird drops lightning bird-themed weapons and accessories, as well as [[Sandstone Ingot]]s, an early game [[crafting material]]. It also drops the [[Zephyr's Feather]] in Expert Mode, an accessory, which allows limited ascending and gliding with the help of a Grand Thunder Bird hatchling. |
||
| Line 21: | Line 21: | ||
=== [[The Queen Jellyfish]] === |
=== [[The Queen Jellyfish]] === |
||
| ⚫ | |||
| + | {{dablink|For elaborate strategies on defeating The Queen Jellyfish, including [[Weapon]] and Arena recommendations, see [[Guide:The Queen Jellyfish strategies]].}} |
||
{| style="width:100%" |
{| style="width:100%" |
||
| − | | width=" |
+ | | width="20%" align=center | [[File:The Queen Jellyfish.png|link=The Queen Jellyfish]] |
| − | | width=" |
+ | | width="80%" | |
| ⚫ | |||
[[File:Jellyfish Resonator.png|right|link=Jellyfish Resonator]] |
[[File:Jellyfish Resonator.png|right|link=Jellyfish Resonator]] |
||
| − | '''The Queen Jellyfish''' is a large pink jellyfish that has the [[Diverman]] [[NPC]] entrapped in its head. It has 4,000 |
+ | '''The Queen Jellyfish''' is a large pink jellyfish that has the [[Diverman]] [[NPC]] entrapped in its head. It has 4,000 / {{expert|5,000}} health and is summoned with a [[Jellyfish Resonator]] while the player is near the [[Ocean]] during the day, but can be fought anywhere nearby afterwards. It summons various types of [[Royal Jelly|Royal Jellies]] to attack the player while launching bubbles that send the player high into the air, and will occasionally create a stationary cyclone to suck the player in. It will also outstretch tentacles to attack the player in Expert Mode when it loses enough life. Defeating The Queen Jellyfish causes the Diverman NPC to drop right out of its head, and enables him to move in to an available [[house]]. |
The Queen Jellyfish drops a variety of jelly-themed weapons, as well as [[Pink Gel]] which is otherwise an item dropped from the rare [[Slime]], [[Pinky]]. It also drops the [[Sea Breeze Pendant]] in Expert Mode, an accessory that grants several improvements to the player when they are underwater. |
The Queen Jellyfish drops a variety of jelly-themed weapons, as well as [[Pink Gel]] which is otherwise an item dropped from the rare [[Slime]], [[Pinky]]. It also drops the [[Sea Breeze Pendant]] in Expert Mode, an accessory that grants several improvements to the player when they are underwater. |
||
| Line 32: | Line 33: | ||
=== [[Viscount]] === |
=== [[Viscount]] === |
||
| ⚫ | |||
| ⚫ | |||
| ⚫ | |||
[[File:Viscount Trophy.png|left|link=Viscount Trophy]] |
[[File:Viscount Trophy.png|left|link=Viscount Trophy]] |
||
| ⚫ | |||
| ⚫ | |||
| ⚫ | |||
[[File:Blood Altar.png|right|link=Blood Altar]] |
[[File:Blood Altar.png|right|link=Blood Altar]] |
||
| − | The '''Viscount''' is a large royal bat with 6,000 |
+ | The '''Viscount''' is a large royal bat with 6,000 / {{expert|8,000}} health. It is summoned by using 5 [[Unholy Shards]] at a [[Blood Altar]] in the [[Cavern]] layer. The Viscount flies above the player, launching ricocheting echo pulses. It will also release multiple splashes of blood, stomp the ground stunning players, releases a ceiling breaking scream, summons life stealing [[Bitey Baby|Bitey Babies]], and turns players into helpless bats in Expert Mode. |
The Viscount drops a variety of bat-themed weapons, as well as the [[Vampire's Catalyst]] in Expert Mode, a [[transformation]] item which allows you to turn into a bat. |
The Viscount drops a variety of bat-themed weapons, as well as the [[Vampire's Catalyst]] in Expert Mode, a [[transformation]] item which allows you to turn into a bat. |
||
| Line 43: | Line 44: | ||
=== [[Granite Energy Storm]] === |
=== [[Granite Energy Storm]] === |
||
| ⚫ | |||
{| style="width:100%" |
{| style="width:100%" |
||
| − | | width=" |
+ | | width="20%" align=center | [[File:Granite Energy Storm.png|link=Granite Energy Storm]] |
| − | | width=" |
+ | | width="80%" | |
| ⚫ | |||
[[File:Unstable Core.png|right|link=Unstable Core]] |
[[File:Unstable Core.png|right|link=Unstable Core]] |
||
| − | The '''Granite Energy Storm''' is a large granite core surrounded by energy. It has 7,000 |
+ | The '''Granite Energy Storm''' is a large granite core surrounded by energy. It has 7,000 / {{expert|9,000}} health and has to be summoned by killing a [[Unstable Energy Anomaly]] in the [[Granite Cave]]s or by using the [[Unstable Core]] in the [[Cavern]] [[layer]]. It uses a slightly delayed charge attack on the player while generating a circle of [[Coalesced Energy]] around itself, absorbing many of the player's attacks; this energy will then break off from the circle and home in on the player once seemingly destroyed. It will refresh its energy eventually if it is lost, and will also begin to launch energy balls from its core as it loses life, which deal high damage. |
| − | The Granite Energy Storm drops energized granite-themed weapons, as well as the [[Eye of the Storm]] in Expert Mode, an accessory that releases damaging energy which homes in on enemies. |
+ | The Granite Energy Storm drops energized granite-themed weapons, as well as the [[Eye of the Storm]] in Expert Mode, an accessory that releases damaging energy in combat, which homes in on enemies. |
|} |
|} |
||
=== [[The Buried Champion]] === |
=== [[The Buried Champion]] === |
||
| ⚫ | |||
| + | {{dablink|For elaborate strategies on defeating The Buried Champion, including [[Weapon]] and Arena recommendations, see [[Guide:The Buried Champion strategies]].}} |
||
{| style="width:100%" |
{| style="width:100%" |
||
| − | | width=" |
+ | | width="20%" align=center | [[File:The Buried Champion.png|link=The Buried Champion]] |
| − | | width=" |
+ | | width="80%" | |
| ⚫ | |||
[[File:Ancient Blade.png|right|link=Ancient Blade]] |
[[File:Ancient Blade.png|right|link=Ancient Blade]] |
||
| − | '''The Buried Champion''' is a boss which resembles a winged Greek warrior. It has 7,000 health |
+ | '''The Buried Champion''' is a boss which resembles a winged Greek warrior. It has 7,000 health / {{expert|9,000}} and has to be summoned by killing a [[Bizarre Rock Formation]] in the [[Marble Cave]]s or by using the [[Ancient Blade]] in the [[Cavern]] [[layer]]. It will start out by using its blade to charge at the player, launch wind slices, and summon daggers from above. As it loses health, it will switch to using its bow, firing regular and elemental arrows at the player; and for its final phase will use its staff to fire volatile magic orbs while also summoning invulnerable echoes of itself to assist it. Defeating The Buried Champion is required for the [[Spiritualist]] [[NPC]] to move in. |
| − | The Buried Champion drops Greek bronze-themed weapons and accessories, as well as the [[Champion's Wings]] in Expert Mode, which are the |
+ | The Buried Champion drops Greek bronze-themed weapons and accessories, as well as the [[Champion's Wings]] in Expert Mode, which are the only possible wings accessory available before [[Hardmode]]. |
|} |
|} |
||
=== [[The Star Scouter]] === |
=== [[The Star Scouter]] === |
||
| ⚫ | |||
| ⚫ | |||
| ⚫ | |||
[[File:Scouter Trophy.png|left|link=Scouter Trophy]] |
[[File:Scouter Trophy.png|left|link=Scouter Trophy]] |
||
| + | {{dablink|For elaborate strategies on defeating The Star Scouter, including [[Weapon]] and Arena recommendations, see [[Guide:The Star Scouter strategies]].}} |
||
| ⚫ | |||
| ⚫ | |||
| ⚫ | |||
[[File:Star Caller.png|right|link=Star Caller]] |
[[File:Star Caller.png|right|link=Star Caller]] |
||
| − | '''The Star Scouter''' is a large alien saucer which attacks with a series of purple lasers and beams. It is summoned with a [[Star Caller]] which can only be used in the [[Space]] biome. It has 8,000 |
+ | '''The Star Scouter''' is a large alien saucer which attacks with a series of purple lasers and beams. It is summoned with a [[Star Caller]] which can only be used in the [[Space]] biome. It has 8,000 / {{expert|10,000}} health and is the most difficult boss before the [[Wall of Flesh]]. It will start out by using a vertical laser beam attack that creates horizontal energy waves when contacting a tile. It will add new attacks to its pattern as it loses life, including singular bursts of energy, homing graviton surges, and triplet energy beams. In Expert Mode, it also gains an unstable energy orb attack and at 25% life will release three [[Scouter Cores]] which attack the player and must be defeated for the fight to continue. |
The Star Scouter drops meteoric, space-themed weapons, as well as the [[Omega Drive]] in Expert Mode, which summons a pet that can attack [[enemies]]. |
The Star Scouter drops meteoric, space-themed weapons, as well as the [[Omega Drive]] in Expert Mode, which summons a pet that can attack [[enemies]]. |
||
| Line 77: | Line 80: | ||
== [[Hardmode]] Bosses == |
== [[Hardmode]] Bosses == |
||
=== [[Borean Strider]] === |
=== [[Borean Strider]] === |
||
| ⚫ | |||
| + | {{dablink|For elaborate strategies on defeating Borean Strider, including [[Weapon]] and Arena recommendations, see [[Guide:Borean Strider strategies]].}} |
||
{| style="width:100%" |
{| style="width:100%" |
||
| − | | width=" |
+ | | width="20%" align=center | [[File:Borean Strider.png|link=Borean Strider]] |
| − | | width=" |
+ | | width="80%" | |
| − | |||
| ⚫ | |||
[[File:Strider's Tear.png|right|link=Strider's Tear]] |
[[File:Strider's Tear.png|right|link=Strider's Tear]] |
||
| − | The '''Borean Strider''' is a boss that spawns randomly in the [[Snow biome]] during a [[Blizzard]] |
+ | The '''Borean Strider''' is a boss that spawns randomly in the [[Snow biome]] during a [[Blizzard]], or through use of a [[Strider's Tear]]. It has 10,000 / {{expert|15,000}} health split over 2 phases. It leaps at the player, creating shockwaves as it lands, and shoots icicles at the player with increasing frequency as its health depletes. It also releases waves of snow and spawns [[Borean Hopper]]s and [[Borean Myte]]s during its second phase. Its attacks also inflict various ice-themed debuffs upon players. |
| − | The Borean Strider drops frost-themed weapons, as well as the [[Ice Bound Strider Hide]] in Expert Mode, an accessory that provides bonuses to players using weapons that inflict the [[Freezing]] [[debuff]]. Upon its defeat, new enemies will begin to spawn in underground [[Spider |
+ | The Borean Strider drops frost-themed weapons, as well as the [[Ice Bound Strider Hide]] in Expert Mode, an accessory that provides bonuses to players using weapons that inflict the [[Freezing]] [[debuff]]. Upon its defeat, new enemies will begin to spawn in underground [[Spider Cave]]s. |
|} |
|} |
||
| − | ===[[Coznix, The Fallen Beholder]]=== |
+ | === [[Coznix, The Fallen Beholder]] === |
| ⚫ | |||
{| style="width:100%" |
{| style="width:100%" |
||
| − | | width=" |
+ | | width="20%" align=center | [[File:Coznix, The Fallen Beholder.png|link=Coznix, The Fallen Beholder]] |
| − | | width=" |
+ | | width="80%" | |
| − | |||
| ⚫ | |||
[[File:Void Lens.png|right|link=Void Lens]] |
[[File:Void Lens.png|right|link=Void Lens]] |
||
| − | '''Coznix, The Fallen Beholder''' is a cephalopod-like boss that is summoned by consuming the [[Void Lens]]. It has 17,500 health |
+ | '''Coznix, The Fallen Beholder''' is a cephalopod-like boss that is summoned by consuming the [[Void Lens]]. It has 17,500 health / {{expert|25,000}} health. It attacks with eradication beams and charge attacks at first. After losing 20% of its health it will begin to unleash a large spread of dark magic that debuffs the player but deals no damage. Sometimes it will summon [[Enemy Beholder]]s to assist it. After losing 65% of its health it will begin to summon slow moving void gates that shoot powerful laser beams directly downwards. |
| − | Upon reaching 40% of its maximum health in Expert Mode, |
+ | Upon reaching 40% of its maximum health in Expert Mode, it will enter its second phase. As well as ramming into the player more often, it will unleash eradication beams and void gates far more quickly, its void gate will additionally cause a tidal wave of lava to rupture from below, and many of its attacks inflict a damaging burn on the player. |
Coznix drops infernal, demonic-themed weapons and accessories, as well as the [[Beholder Staff]] in Expert Mode, a summon weapon that calls forth Mini Beholders to blast energy at [[enemies]]. Upon its defeat, [[Lodestone Chunk]]s and [[Valadium Chunk]]s will generate throughout the world; this can happen up to three times per ore with each successive defeat. |
Coznix drops infernal, demonic-themed weapons and accessories, as well as the [[Beholder Staff]] in Expert Mode, a summon weapon that calls forth Mini Beholders to blast energy at [[enemies]]. Upon its defeat, [[Lodestone Chunk]]s and [[Valadium Chunk]]s will generate throughout the world; this can happen up to three times per ore with each successive defeat. |
||
| Line 103: | Line 105: | ||
=== [[The Lich]] === |
=== [[The Lich]] === |
||
| ⚫ | |||
{| style="width:100%" |
{| style="width:100%" |
||
| − | | width=" |
+ | | width="20%" align=center | [[File:The Lich.png|link=The Lich]] |
| − | | width=" |
+ | | width="80%" | |
| − | |||
| ⚫ | |||
[[File:Grim Harvest Sigil.png|right|link=Grim Harvest Sigil]] |
[[File:Grim Harvest Sigil.png|right|link=Grim Harvest Sigil]] |
||
| − | '''The Lich''' is a skeleton-like boss summoned with the [[Grim Harvest Sigil]]. It has |
+ | '''The Lich''' is a skeleton-like boss summoned with the [[Grim Harvest Sigil]]. It has 25,000 / {{expert|40,000}} health (40,000 split over 2 phases in Expert Mode). It rapidly fires flaming lasers from its eyes, rains down giant fireballs and spawns a bolt that stagnates mid-air or on tile impact. |
| − | Upon |
+ | Upon reaching 25% of its maximum health in Expert Mode, it will [[The Lich (Unmasked)|enter its second phase]]. In this form it rushes at the player with high speed and damage, shoots projectiles from its scythe, spawns colossal burning spirit balls and spawns the [[Phylactery of a Thousand Souls]], which will fortify its defense greatly until it is killed. |
| − | The Lich drops deathly, soul-themed weapons and accessories, as well as [[Cursed Cloth]], a [[crafting material]] that is used to make [[Lich armor]]. It also drops the [[ |
+ | The Lich drops deathly, soul-themed weapons and accessories, as well as [[Cursed Cloth]], a [[crafting material]] that is used to make [[Lich armor]]. It also drops the [[Beholder's Gaze]] in Expert Mode, an accessory that can grant temporary guaranteed critical strikes for throwing weapons. |
|} |
|} |
||
| − | ===[[Abyssion, The Forgotten One]]=== |
+ | === [[Abyssion, The Forgotten One]] === |
| ⚫ | |||
{| style="width:100%" |
{| style="width:100%" |
||
| − | | width=" |
+ | | width="20%" align=center | [[File:Abyssion, The Forgotten One.png|link=Abyssion, The Forgotten One]] |
| − | | width=" |
+ | | width="80%" | |
| ⚫ | |||
[[File:Abyssal Shadow.png|right|link=Abyssal Shadow]] |
[[File:Abyssal Shadow.png|right|link=Abyssal Shadow]] |
||
| − | '''Abyssion, The Forgotten One''' is a crab-like boss fought in the [[Aquatic Depths]] |
+ | '''Abyssion, The Forgotten One''' is a crab-like boss fought in the [[Aquatic Depths]] with 46,000 / {{expert|81,000}} health split over 2 / {{expert|3}} phases. It spawns automatically after collecting 3 [[Abyssal Shadow]]s dropped by [[Aquatic Hallucination]]s, but after its defeat, Abyssal Shadows can be used to manually summon the boss. The Forgotten One has multiple attacks that become more numerous and frequent as its health depletes. Once seemingly defeated, the boss enters its second phase in which it has all of its attacks from the first but with added frequency and damage, and a new dark wave attack. |
In Expert Mode, Abyssion has a third and final phase in which its attacks become imbued with dark magic and it moves much faster, attempting to ram the player with incredible speed. |
In Expert Mode, Abyssion has a third and final phase in which its attacks become imbued with dark magic and it moves much faster, attempting to ram the player with incredible speed. |
||
| Line 129: | Line 130: | ||
|} |
|} |
||
| − | === [[The |
+ | === [[The Primordials]] === |
| ⚫ | |||
| + | {{dablink|For elaborate strategies on defeating The Primordials, including [[Weapon]] and Arena recommendations, see [[Guide:The Primordials strategies]].}} |
||
{| style="width:100%" |
{| style="width:100%" |
||
| − | | width=" |
+ | | width="20%" align=center | [[File:The Primordials.png|link=The Primordials]] |
| − | | width=" |
+ | | width="80%" | |
| − | |||
| ⚫ | |||
[[File:Doom Sayer's Coin.png|right|link=Doom Sayer's Coin]] |
[[File:Doom Sayer's Coin.png|right|link=Doom Sayer's Coin]] |
||
| − | '''The |
+ | '''The Primordials''' is the final [[boss]] of the Thorium mod, summoned with the [[Doom Sayer's Coin]]. It consists of three bosses: Aquaius, The Endless Tide; Omnicide, The Life Defiler; and Slag Fury, The First Flame; each having their own set of attacks and forms. In total, the encounter has 462,000 / {{expert|793,000}} health split over 3 / {{expert|4}} bosses and several phases. |
| + | |||
| + | They each take turns assaulting the player with their own variety of attacks, requiring the player to adapt to the Primordial that is currently out; the Primordials not currently active will be intangible. |
||
| − | If |
+ | If all of them are defeated in Expert Mode, the [[The Primordials#In Expert Mode|final phase]] of the fight will begin. |
| − | The |
+ | The Primordials, when fully defeated, drops the three [[Primordial Essences]], [[crafting material]]s used to make the most powerful gear available in the mod. It can also drop three unique items in Expert Mode: [[The Omega Core]], an accessory that grants incredible speed; the [[Bow of Light]], a rare true weapon with an extremely powerful charge attack; and the [[Dormant Hammer]], which is used to craft the ultimate weapon of the mod, [[Mjölnir]]. |
|} |
|} |
||
| Line 146: | Line 149: | ||
=== [[Patch Werk]] === |
=== [[Patch Werk]] === |
||
{| style="width:100%" |
{| style="width:100%" |
||
| − | | width=" |
+ | | width="20%" align=center | [[File:Patch Werk.png|link=Patch Werk]] |
| − | | width=" |
+ | | width="80%" | |
| ⚫ | |||
| − | |||
| ⚫ | '''Patch Werk''' is a mini-boss found during a [[Blood Moon]]. It has 500 |
||
When killed, the [[Confused Zombie]] will be able to move in when there is sufficient housing, and the [[Abomination]] will replace [[Patch Werk]] in future [[Blood Moon]]s. It will also drop two tome items: [[The Good Book]], a basic Healer spell to assist allied players; and the [[Grave Buster]], a magic weapon that summons skeletal hands from out of the ground. |
When killed, the [[Confused Zombie]] will be able to move in when there is sufficient housing, and the [[Abomination]] will replace [[Patch Werk]] in future [[Blood Moon]]s. It will also drop two tome items: [[The Good Book]], a basic Healer spell to assist allied players; and the [[Grave Buster]], a magic weapon that summons skeletal hands from out of the ground. |
||
|} |
|} |
||
| + | |||
=== [[Corpse Bloom]] === |
=== [[Corpse Bloom]] === |
||
{| style="width:100%" |
{| style="width:100%" |
||
| − | | width=" |
+ | | width="20%" align=center | [[File:Corpse Bloom.png|link=Corpse Bloom]] |
| − | | width=" |
+ | | width="80%" | |
| ⚫ | '''Corpse Bloom''' is a mini-boss that can be found rarely in the [[Underground Jungle]] after [[Skeletron]] has been defeated. It has 1000 / {{expert|2,000}} health. It spawns up to 3 [[Corpse Petal]]s, after which it fires a barrage of fungi. Every 25% health lost, it summons a [[Corpse Weed]] to attack the player. |
||
| + | When killed, the [[Druid]] will be able to move in when there is sufficient housing. It will also drop the [[Bloom Guard]], a Healer support staff that can increase the defense and life regeneration of players affected by it, and the [[Weed Eater]], a sentry that summons a poison spitting corpse weed. |
||
| ⚫ | |||
| + | |} |
||
| + | |||
| + | === [[Illusionist]] === |
||
| + | {| style="width:100%" |
||
| + | | width="20%" align="center" | [[File:Illusionist.png|link=Illusionist]] |
||
| + | | width="80%" | |
||
| + | [[File:Peculiar Mirror.png|right|link=Peculiar Mirror]] |
||
| + | The '''Illusionist''' is a mini-boss that is summoned by interacting with a [[Peculiar Mirror]], which can be found rarely in the [[Dungeon]]. It has 1,250 / {{expert|2,500}} health. The Illusionist teleports around the player while firing [[Illusion Glass]]es at the player. It also summons two [[Illusionist's Mirror]]s to orbit around it and deflect attacks, and [[Illusionist Decoy]]s to attack and distract the player. |
||
| − | When killed, the [[ |
+ | When killed, it will drop two items: the [[Mage Hand]], a tool that can pick up and move items, Town NPCs, and enemies; and the [[Scrying Glass]], a summoner accessory that increases the player's maximum number of sentries and their range of view. |
|} |
|} |
||
| Line 174: | Line 186: | ||
| align=center | {{item|The Grand Thunder Bird|size=80px|mode=table|class=block aligncenter textleft}} |
| align=center | {{item|The Grand Thunder Bird|size=80px|mode=table|class=block aligncenter textleft}} |
||
|- |
|- |
||
| − | | align=center | [[File:King Slime.png|80px]] || [[ |
+ | | align=center | [[File:King Slime.png|80px]] || [[King Slime]] |
|- |
|- |
||
| − | | align=center | [[File:Eye of Cthulhu.png|60px]] || [[ |
+ | | align=center | [[File:Eye of Cthulhu.png|60px]] || [[Eye of Cthulhu]] |
|- |
|- |
||
| − | | align=center | [[File:Eater of Worlds.png|100px]] [[File:Brain of Cthulhu.png|80px]] || [[ |
+ | | align=center | [[File:Eater of Worlds.png|100px]] [[File:Brain of Cthulhu.png|80px]] || [[Eater of Worlds]] ''or'' [[Brain of Cthulhu]] |
|- |
|- |
||
| align=center | {{item|The Queen Jellyfish|size=70px|mode=table|class=block aligncenter textleft}} |
| align=center | {{item|The Queen Jellyfish|size=70px|mode=table|class=block aligncenter textleft}} |
||
| Line 184: | Line 196: | ||
| align=center | {{item|Viscount|size=90px|mode=table|class=block aligncenter textleft}} |
| align=center | {{item|Viscount|size=90px|mode=table|class=block aligncenter textleft}} |
||
|- |
|- |
||
| − | | align=center | [[File:Queen Bee.png|75px]] || [[ |
+ | | align=center | [[File:Queen Bee.png|75px]] || [[Queen Bee]] |
|- |
|- |
||
| − | | align=center | [[File:Skeletron.png|90px]] || [[ |
+ | | align=center | [[File:Skeletron.png|90px]] || [[Skeletron]] |
|- |
|- |
||
| align=center | [[File:Granite Energy Storm.png|44px]] [[File:The Buried Champion.png|64px]] || [[Granite Energy Storm]] ''and'' [[The Buried Champion]] |
| align=center | [[File:Granite Energy Storm.png|44px]] [[File:The Buried Champion.png|64px]] || [[Granite Energy Storm]] ''and'' [[The Buried Champion]] |
||
| Line 192: | Line 204: | ||
| align=center | {{item|The Star Scouter|size=110px|mode=table|class=block aligncenter textleft}} |
| align=center | {{item|The Star Scouter|size=110px|mode=table|class=block aligncenter textleft}} |
||
|- |
|- |
||
| − | | align=center | [[File:Wall of Flesh.png|60px]] || [[ |
+ | | align=center | [[File:Wall of Flesh.png|60px]] || [[Wall of Flesh]] |
|} |
|} |
||
| |
| |
||
| Line 204: | Line 216: | ||
| align=center | {{item|Coznix, The Fallen Beholder|size=80px|mode=table|class=block aligncenter textleft}} |
| align=center | {{item|Coznix, The Fallen Beholder|size=80px|mode=table|class=block aligncenter textleft}} |
||
|- |
|- |
||
| − | | align=center | [[File:Skeletron Prime.png|40px]] [[File:The Twins.png|80px]] [[File:The Destroyer.png|100px]] || [[ |
+ | | align=center | [[File:Skeletron Prime.png|40px]] [[File:The Twins.png|80px]] [[File:The Destroyer.png|100px]] || [[Mechanical Bosses]] |
|- |
|- |
||
| align=center | {{item|The Lich|size=80px|mode=table|class=block aligncenter textleft}} |
| align=center | {{item|The Lich|size=80px|mode=table|class=block aligncenter textleft}} |
||
|- |
|- |
||
| − | | align=center | [[File:Plantera.png|60px]] || [[ |
+ | | align=center | [[File:Plantera.png|60px]] || [[Plantera]] |
|- |
|- |
||
| − | | align=center | [[File:Golem.png|60px]] || [[ |
+ | | align=center | [[File:Golem.png|60px]] || [[Golem]] |
|- |
|- |
||
| align=center | {{item|Abyssion, The Forgotten One|size=60px|mode=table|class=block aligncenter textleft}} |
| align=center | {{item|Abyssion, The Forgotten One|size=60px|mode=table|class=block aligncenter textleft}} |
||
|- |
|- |
||
| − | | align=center | [[File:Duke Fishron.png|80px]] || [[ |
+ | | align=center | [[File:Duke Fishron.png|80px]] || [[Duke Fishron]] |
|- |
|- |
||
| − | | align=center | [[File:Lunatic Cultist.png|35px]] || [[ |
+ | | align=center | [[File:Lunatic Cultist.png|35px]] || [[Lunatic Cultist]] |
|- |
|- |
||
| − | | align=center | [[File:Moon Lord.png|100px]] || [[ |
+ | | align=center | [[File:Moon Lord.png|100px]] || [[Moon Lord]] |
|- |
|- |
||
| − | ! colspan="2" | Post-[[ |
+ | ! colspan="2" | Post-[[Moon Lord]] |
|- |
|- |
||
| − | | align=center | {{item|The |
+ | | align=center | {{item|The Primordials|size=80px|mode=table|class=block aligncenter textleft}} |
|} |
|} |
||
|} |
|} |
||
| + | {{Master Template Characters |
||
| + | | show-main = yes |
||
| + | | show-boss = yes |
||
| + | }} |
||
[[Category:Boss NPCs|*]] |
[[Category:Boss NPCs|*]] |
||
Revision as of 14:38, 8 January 2022
The Thorium Mod expands on the number of bosses that can be challenged at different points in the game, featuring unique drops and AI, making every encounter a memorable one. Most bosses do not spawn naturally on their own, and thus require their respective boss summoning item to initiate the fight.
In Expert Mode, bosses drop Treasure Bags which contain exciting Expert Mode exclusive items. These include, but are not limited to: the Omega Drive, which summons a pet that is able to attack; and the Dormant Hammer, a key component in the ultimate weapon of the mod, Mjölnir.
Defeating these bosses are not required for game progression, but may be beneficial as they can provide useful items and access to new Town NPCs. Defeating The Primordials, a post-Moon Lord boss, grants new end-game equipment that overpowers some of the vanilla end-game content twice over.
Similar to vanilla Terraria, players that are under prepared may find bosses challenging, and players that are over prepared may find the boss fight too easy. Hence it is up to the player's discretion to adjust the angle at which they tackle the different bosses, ensuring they are able to enjoy fighting them to the best degree.
Pre-Hardmode Bosses
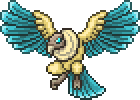
The Grand Thunder Bird
- For elaborate strategies on defeating The Grand Thunder Bird, including Weapon and Arena recommendations, see Guide:The Grand Thunder Bird strategies.
|
The Grand Thunder Bird is a tan and turquoise feathered bird with 1,500 / 2,000 health. It is summoned with a Grand Flare Gun using Storm Flares during the Day in the Desert. It has a delayed charge attack that can be halted with a melee strike, and will also summon Storm Hatchlings, create storm clouds over the player's head that rain down tornado-inducing lightning bolts, and utter loud cries that bring down bolts of energy from the sky. It is considered the easiest boss in Terraria, but may still prove a challenge to unprepared players. Defeating The Grand Thunder Bird is required for the Desert Acolyte NPC to move in. The Grand Thunder Bird drops lightning bird-themed weapons and accessories, as well as Sandstone Ingots, an early game crafting material. It also drops the Zephyr's Feather in Expert Mode, an accessory, which allows limited ascending and gliding with the help of a Grand Thunder Bird hatchling. |
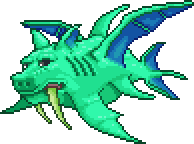
The Queen Jellyfish
- For elaborate strategies on defeating The Queen Jellyfish, including Weapon and Arena recommendations, see Guide:The Queen Jellyfish strategies.

|
The Queen Jellyfish is a large pink jellyfish that has the Diverman NPC entrapped in its head. It has 4,000 / 5,000 health and is summoned with a Jellyfish Resonator while the player is near the Ocean during the day, but can be fought anywhere nearby afterwards. It summons various types of Royal Jellies to attack the player while launching bubbles that send the player high into the air, and will occasionally create a stationary cyclone to suck the player in. It will also outstretch tentacles to attack the player in Expert Mode when it loses enough life. Defeating The Queen Jellyfish causes the Diverman NPC to drop right out of its head, and enables him to move in to an available house. The Queen Jellyfish drops a variety of jelly-themed weapons, as well as Pink Gel which is otherwise an item dropped from the rare Slime, Pinky. It also drops the Sea Breeze Pendant in Expert Mode, an accessory that grants several improvements to the player when they are underwater. |
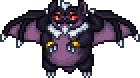
Viscount
|
The Viscount is a large royal bat with 6,000 / 8,000 health. It is summoned by using 5 Unholy Shards at a Blood Altar in the Cavern layer. The Viscount flies above the player, launching ricocheting echo pulses. It will also release multiple splashes of blood, stomp the ground stunning players, releases a ceiling breaking scream, summons life stealing Bitey Babies, and turns players into helpless bats in Expert Mode. The Viscount drops a variety of bat-themed weapons, as well as the Vampire's Catalyst in Expert Mode, a transformation item which allows you to turn into a bat. |
Granite Energy Storm

|
The Granite Energy Storm is a large granite core surrounded by energy. It has 7,000 / 9,000 health and has to be summoned by killing a Unstable Energy Anomaly in the Granite Caves or by using the Unstable Core in the Cavern layer. It uses a slightly delayed charge attack on the player while generating a circle of Coalesced Energy around itself, absorbing many of the player's attacks; this energy will then break off from the circle and home in on the player once seemingly destroyed. It will refresh its energy eventually if it is lost, and will also begin to launch energy balls from its core as it loses life, which deal high damage. The Granite Energy Storm drops energized granite-themed weapons, as well as the Eye of the Storm in Expert Mode, an accessory that releases damaging energy in combat, which homes in on enemies. |
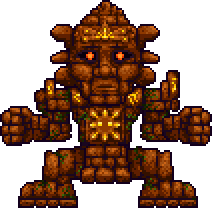
The Buried Champion
- For elaborate strategies on defeating The Buried Champion, including Weapon and Arena recommendations, see Guide:The Buried Champion strategies.

|
The Buried Champion is a boss which resembles a winged Greek warrior. It has 7,000 health / 9,000 and has to be summoned by killing a Bizarre Rock Formation in the Marble Caves or by using the Ancient Blade in the Cavern layer. It will start out by using its blade to charge at the player, launch wind slices, and summon daggers from above. As it loses health, it will switch to using its bow, firing regular and elemental arrows at the player; and for its final phase will use its staff to fire volatile magic orbs while also summoning invulnerable echoes of itself to assist it. Defeating The Buried Champion is required for the Spiritualist NPC to move in. The Buried Champion drops Greek bronze-themed weapons and accessories, as well as the Champion's Wings in Expert Mode, which are the only possible wings accessory available before Hardmode. |
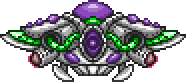
The Star Scouter
- For elaborate strategies on defeating The Star Scouter, including Weapon and Arena recommendations, see Guide:The Star Scouter strategies.
|
The Star Scouter is a large alien saucer which attacks with a series of purple lasers and beams. It is summoned with a Star Caller which can only be used in the Space biome. It has 8,000 / 10,000 health and is the most difficult boss before the Wall of Flesh. It will start out by using a vertical laser beam attack that creates horizontal energy waves when contacting a tile. It will add new attacks to its pattern as it loses life, including singular bursts of energy, homing graviton surges, and triplet energy beams. In Expert Mode, it also gains an unstable energy orb attack and at 25% life will release three Scouter Cores which attack the player and must be defeated for the fight to continue. The Star Scouter drops meteoric, space-themed weapons, as well as the Omega Drive in Expert Mode, which summons a pet that can attack enemies. |
Hardmode Bosses
Borean Strider
- For elaborate strategies on defeating Borean Strider, including Weapon and Arena recommendations, see Guide:Borean Strider strategies.

|
The Borean Strider is a boss that spawns randomly in the Snow biome during a Blizzard, or through use of a Strider's Tear. It has 10,000 / 15,000 health split over 2 phases. It leaps at the player, creating shockwaves as it lands, and shoots icicles at the player with increasing frequency as its health depletes. It also releases waves of snow and spawns Borean Hoppers and Borean Mytes during its second phase. Its attacks also inflict various ice-themed debuffs upon players. The Borean Strider drops frost-themed weapons, as well as the Ice Bound Strider Hide in Expert Mode, an accessory that provides bonuses to players using weapons that inflict the Freezing debuff. Upon its defeat, new enemies will begin to spawn in underground Spider Caves. |
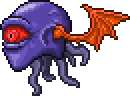
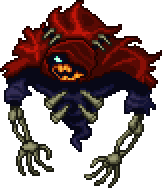
Coznix, The Fallen Beholder
|
Coznix, The Fallen Beholder is a cephalopod-like boss that is summoned by consuming the Void Lens. It has 17,500 health / 25,000 health. It attacks with eradication beams and charge attacks at first. After losing 20% of its health it will begin to unleash a large spread of dark magic that debuffs the player but deals no damage. Sometimes it will summon Enemy Beholders to assist it. After losing 65% of its health it will begin to summon slow moving void gates that shoot powerful laser beams directly downwards. Upon reaching 40% of its maximum health in Expert Mode, it will enter its second phase. As well as ramming into the player more often, it will unleash eradication beams and void gates far more quickly, its void gate will additionally cause a tidal wave of lava to rupture from below, and many of its attacks inflict a damaging burn on the player. Coznix drops infernal, demonic-themed weapons and accessories, as well as the Beholder Staff in Expert Mode, a summon weapon that calls forth Mini Beholders to blast energy at enemies. Upon its defeat, Lodestone Chunks and Valadium Chunks will generate throughout the world; this can happen up to three times per ore with each successive defeat. |
The Lich
|
The Lich is a skeleton-like boss summoned with the Grim Harvest Sigil. It has 25,000 / 40,000 health (40,000 split over 2 phases in Expert Mode). It rapidly fires flaming lasers from its eyes, rains down giant fireballs and spawns a bolt that stagnates mid-air or on tile impact. Upon reaching 25% of its maximum health in Expert Mode, it will enter its second phase. In this form it rushes at the player with high speed and damage, shoots projectiles from its scythe, spawns colossal burning spirit balls and spawns the Phylactery of a Thousand Souls, which will fortify its defense greatly until it is killed. The Lich drops deathly, soul-themed weapons and accessories, as well as Cursed Cloth, a crafting material that is used to make Lich armor. It also drops the Beholder's Gaze in Expert Mode, an accessory that can grant temporary guaranteed critical strikes for throwing weapons. |
Abyssion, The Forgotten One

|
Abyssion, The Forgotten One is a crab-like boss fought in the Aquatic Depths with 46,000 / 81,000 health split over 2 / 3 phases. It spawns automatically after collecting 3 Abyssal Shadows dropped by Aquatic Hallucinations, but after its defeat, Abyssal Shadows can be used to manually summon the boss. The Forgotten One has multiple attacks that become more numerous and frequent as its health depletes. Once seemingly defeated, the boss enters its second phase in which it has all of its attacks from the first but with added frequency and damage, and a new dark wave attack. In Expert Mode, Abyssion has a third and final phase in which its attacks become imbued with dark magic and it moves much faster, attempting to ram the player with incredible speed. Abyssion drops aquatic, abyssal-themed weapons, as well as the Abyssal Shell in Expert Mode, an accessory that can grant invulnerability at the cost of movement, life regeneration and attack capability. |
The Primordials
- For elaborate strategies on defeating The Primordials, including Weapon and Arena recommendations, see Guide:The Primordials strategies.
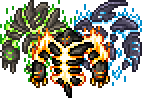
|
The Primordials is the final boss of the Thorium mod, summoned with the Doom Sayer's Coin. It consists of three bosses: Aquaius, The Endless Tide; Omnicide, The Life Defiler; and Slag Fury, The First Flame; each having their own set of attacks and forms. In total, the encounter has 462,000 / 793,000 health split over 3 / 4 bosses and several phases. They each take turns assaulting the player with their own variety of attacks, requiring the player to adapt to the Primordial that is currently out; the Primordials not currently active will be intangible. If all of them are defeated in Expert Mode, the final phase of the fight will begin. The Primordials, when fully defeated, drops the three Primordial Essences, crafting materials used to make the most powerful gear available in the mod. It can also drop three unique items in Expert Mode: The Omega Core, an accessory that grants incredible speed; the Bow of Light, a rare true weapon with an extremely powerful charge attack; and the Dormant Hammer, which is used to craft the ultimate weapon of the mod, Mjölnir. |
Mini Bosses
Patch Werk

|
Patch Werk is a mini-boss found during a Blood Moon. It has 500 / 1,000 health. Patch Werk slowly moves towards the player to deal damage. In Expert Mode, it will also use a damaging shockwave attack that summons Famished Maggots. When killed, the Confused Zombie will be able to move in when there is sufficient housing, and the Abomination will replace Patch Werk in future Blood Moons. It will also drop two tome items: The Good Book, a basic Healer spell to assist allied players; and the Grave Buster, a magic weapon that summons skeletal hands from out of the ground. |
Corpse Bloom
|
Corpse Bloom is a mini-boss that can be found rarely in the Underground Jungle after Skeletron has been defeated. It has 1000 / 2,000 health. It spawns up to 3 Corpse Petals, after which it fires a barrage of fungi. Every 25% health lost, it summons a Corpse Weed to attack the player. When killed, the Druid will be able to move in when there is sufficient housing. It will also drop the Bloom Guard, a Healer support staff that can increase the defense and life regeneration of players affected by it, and the Weed Eater, a sentry that summons a poison spitting corpse weed. |
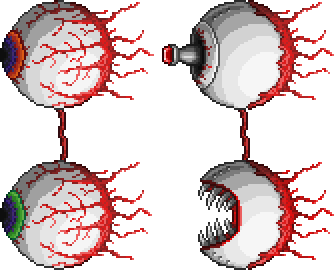
Illusionist
|
The Illusionist is a mini-boss that is summoned by interacting with a Peculiar Mirror, which can be found rarely in the Dungeon. It has 1,250 / 2,500 health. The Illusionist teleports around the player while firing Illusion Glasses at the player. It also summons two Illusionist's Mirrors to orbit around it and deflect attacks, and Illusionist Decoys to attack and distract the player. When killed, it will drop two items: the Mage Hand, a tool that can pick up and move items, Town NPCs, and enemies; and the Scrying Glass, a summoner accessory that increases the player's maximum number of sentries and their range of view. |
Boss Progression


| Characters: | |||||||||||||||||||||||||||||||||||||||||||||||||||||||||||||||||||||||||||||||||||||||||||||||||||||||||||
|---|---|---|---|---|---|---|---|---|---|---|---|---|---|---|---|---|---|---|---|---|---|---|---|---|---|---|---|---|---|---|---|---|---|---|---|---|---|---|---|---|---|---|---|---|---|---|---|---|---|---|---|---|---|---|---|---|---|---|---|---|---|---|---|---|---|---|---|---|---|---|---|---|---|---|---|---|---|---|---|---|---|---|---|---|---|---|---|---|---|---|---|---|---|---|---|---|---|---|---|---|---|---|---|---|---|---|---|
| |||||||||||||||||||||||||||||||||||||||||||||||||||||||||||||||||||||||||||||||||||||||||||||||||||||||||||